How To Mould With Compo
Compo is a handmade restoration product, created using a traditional recipe refined by an experienced restorer and gilder. It is suitable for use on mirror and picture frames or other decorative mouldings, Compo is used for repairing or replacing missing decoration simply heat the compo and hand model or carve to match the contours of the moulding or press into a mould. This simple guide will show you the basics of creating a mold and creating a moulding out of Compo.
Step 1
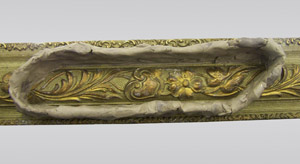
Make a clay wall around the section of the frame you would like moulded, taking care to ensure there are no gaps in the clay wall.

Step 2
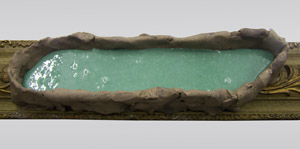
Cut up the hot melt rubber (we recommend Gelflex) into a microwavable dish and microwave for a few minutes, stir and then repeat until the rubber is melted. Take care not to overheat the rubber otherwise air bubbles will form. If this occurs keep stirring the molten rubber until it cools slightly to disperse the bubbles.

Step 3
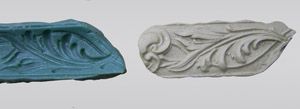
When the rubber has cooled remove the clay and peel off the mould. A small mould, as in this example, does not take much time to cool, in this case requiring approximately five minutes. Make sure the mould is free of dirt and dust by washing it in warm, soapy water and leaving it to dry.

Step 4
Press the warmed compo into the mould.

Step 5
After about a minute peel the compo from the mould. You can now trim it with a scalpel and use it to repair the damaged decoration.

Step 6
The moulded section can be adhered to the surface by heating the back, this heats the glue which is already in the compo. Put a large, glazed tile over a pan of boiling water, spraying the tile with water to keep it wet. Rub the back of the compo decoration along the tile until the back starts to melt. Place the compo decoration where you need it. For long pieces you may need to use some slim nails as well. Wood glue is good for awkward pieces.
